Sunday, October 7, 2012

Flat Chicken Enchiladas with Gluten Free Enchilada Sauce


Why would you want flat enchiladas you ask? Well, because corn tortillas break easily. And since I am a gluten free eater, it makes sense to not try to fold the enchiladas into rolls, but to make them flat. I came up with this idea after trying to roll my first enchilada today... thinking that it would be kinda like an enchilada stack. Or an enchilada lasagna. I had lots of kale around from the garden, and lots of homemade green tomato salsa, some chicken, beans and peppers. Nothing like a chilly Sunday in the kitchen to make a girl creative. 


Here is the recipe for my new favorite casserole-ish dish. That proudly does not have any cream of yucky soup. It can be made 2 days ahead and kept in the fridge. Just take it out and bake it as the directions below say. Or, made and frozen. If you are going to freeze it, make sure to let it defrost in the fridge 24 hours before baking.

Anyway...... 


Flat Chicken Enchiladas with Gluten Free Enchilada Sauce (omit chicken to make vegetarian)

Ingredients

  • 2 large chicken breasts
  • 1/3 cup water
  • 2 tbsp. lime juice (preferably fresh)
  • 1 1/2 tbsp. homemade gluten free taco seasoning 
  • evoo
  • 1 red bell pepper, thinly chopped
  • 2 handfulls of kale, chopped
  • 1 can of black beans, rinsed and drained
  • 1 tsp Sriracha (optional)
  • 1/3 c. sour cream (or nonfat greek yogurt) 
  • 1/2 quart jar green tomato salsa, pureed (you could certainly use a can of store bought enchilada sauce... but it won't do anything for your abundance of green tomatoes. and obviously, won't be nearly as good ;)
  • 7 corn tortillas, halved
  • 2/3 can non-fat refried beans (I prefer vegetarian)
  • 1/2 cup. shredded cheese (mexican blend, or whatever you would like) 


Ingredient prep:


  1.  Place the chicken breasts in an 8x8 baking dish. Add 1/3 cup water and lime juice. Sprinkle the breasts with the taco seasoning. Refrigerate. Marinate for at least 15-20 minutes- up to 3 hours. (Don't leave any meat marinating for too long if the marinade has citrus. The citrus will start to cook the proteins in the meat after a while.)
  2.  Once the chicken is ready, slice it into strips.  In a large skillet, get 1 tbsp. of evoo hot over medium heat. Add the chicken, spice side-down. Let it cook 3 minutes and flip. 
  3.  Add the marinade. You are going to simmer this for a while, so don't worry about the fact that raw chicken was in the marinade. It will actually add a lot of flavor and you will definitely cook away anything that is suspect. 
  4. Bring the marinade up to a boil, reduce heat and simmer. Add water if needed. Cook until the marinade becomes a sauce, 15 minutes or so. (you can add a tsp. of corn starch to thicken up the sauce if you need to. 
  5. Once the sauce is thickened, remove from heat and place chicken and sauce in a bowl to cool.
  6. Return the skillet to the burner over medium heat. Add another drizzle of evoo. 
  7.  Add the chopped red peppers, cooking until fragrant and some of the skins start to turn brown. Add the kale. Cook another minute and add the beans. Stir frequently, cooking off as much liquid as possible. Remove from heat and reserve in a bowl. 


***Preheat oven to 350.****
Wash your 8x8 baking dish that you marinated the chicken in. You will construct the enchiladas in this.

Begin construction of the flat enchiladas.

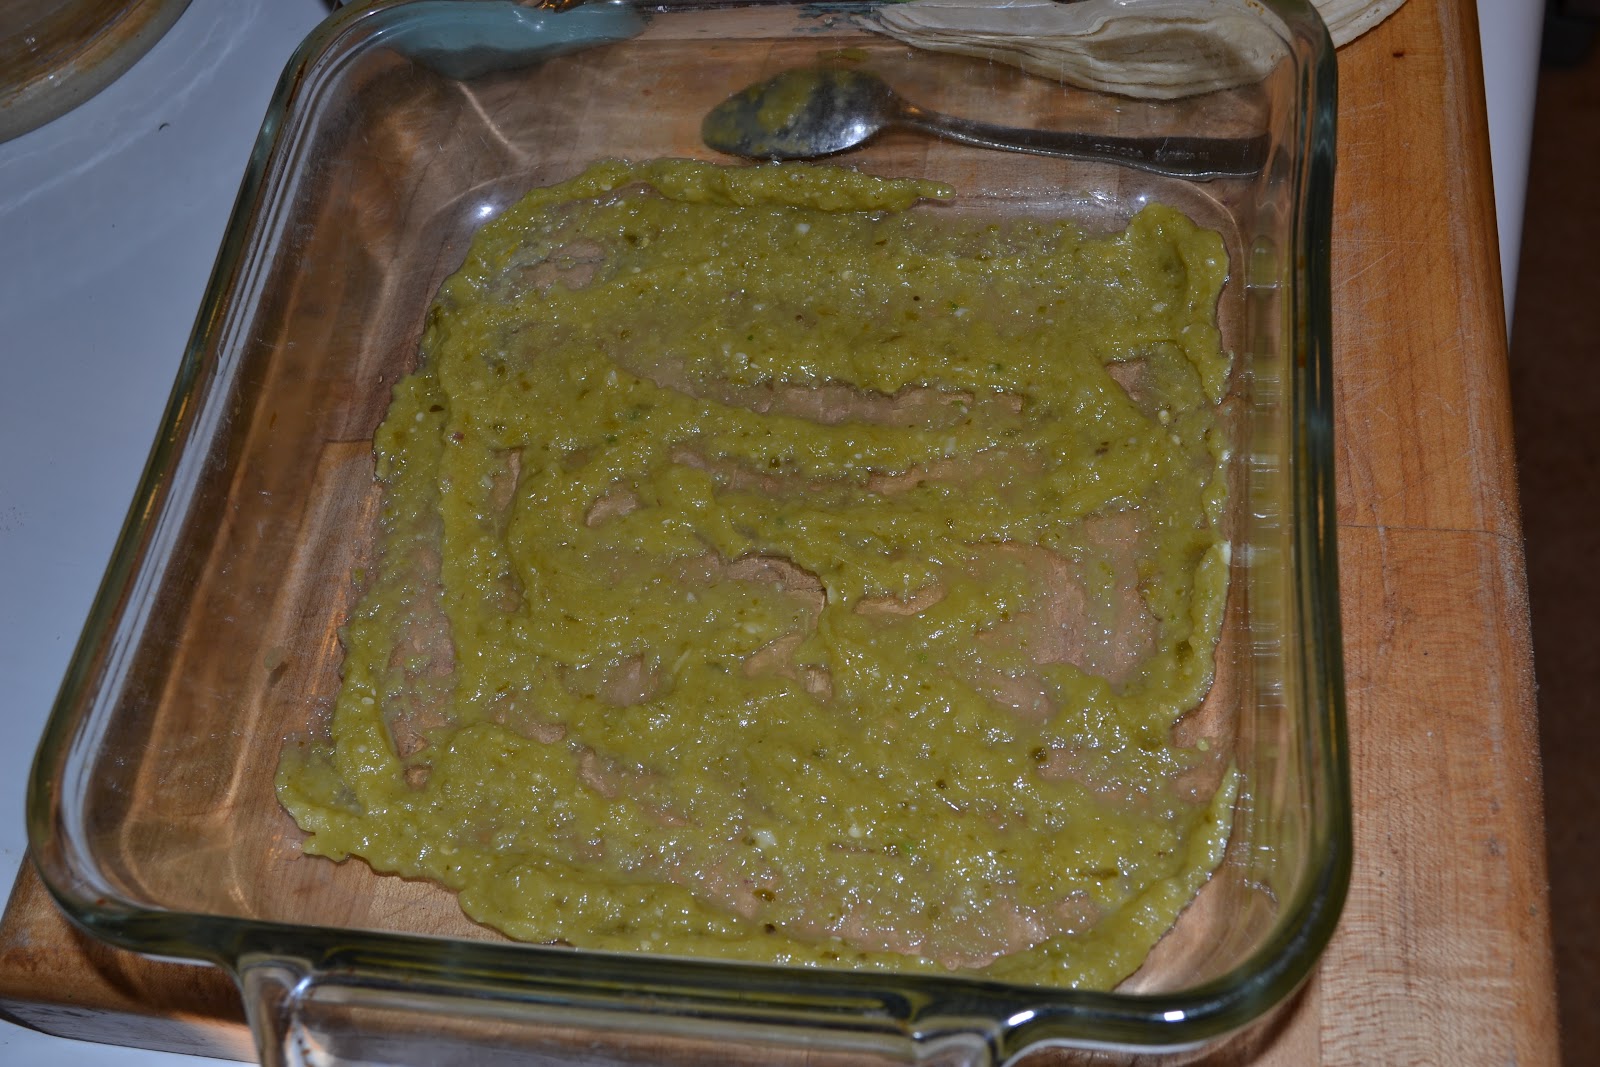
  1. Spread green tomato salsa across the bottom of the baking dish to prevent sticking 
  2. top with 4 tortillas- space to minimize overlapping.
  3. Layer black beans/kale/red pepper mixture. Then refried beans.
  4. Layer the chicken next, tearing it into bite size pieces
  5. Top with sour cream (add the sriracha to the sour cream and mix together for a nice kick) and some more of the green tomato salsa
  6. Next, put down another layer of corn tortillas. Layer remaining black bean mixture, refried beans and chicken. 
  7. Rough chop the remaining corn tortillas (should be about 3 halves left) and mix them into the shredded cheese (this will give the topping a nice *crunch* as the tortillas brown.)
  8. Top with more green salsa, pressing the salsa down with a spatula to sink all the ingredients below and to get rid of air pockets
  9. Sprinkle shredded cheese/corn tortilla mixture over the top. (this is where you can refrigerate or freeze it. If eating it today, follow baking instructions below.)
  10. Bake uncovered, 30-35 minutes until bubbly. 
  11. Switch the oven to broil to brown the top, if necessary.
  12. Let cool 10-15 minutes before cutting.
Enjoy with a nice gluten-free beer. 

xx&o 

Amy


Taco Seasoning Gluten Free

Here is a great taco seasoning recipe that is gluten free. And monosodium glutimate free. And everything gross free. Have you ever read the back of the taco seasoning packets that you get at the store? Ick.

This is easy, and delicious. Perfect for meat, tofu, mexican salads- etc.

Amy's Taco Seasoning

  • 1 tbsp. chili powder 
  • 1/4 tsp. garlic
  • 1/4 tsp. onion powder
  • 1/4 tsp. dried oregano 
  • 1/4 tsp. crushed red pepper flakes
  • 1/2 tsp. paprika
  • 1 1/2 tsp. cumin
  • 1 tsp. sea salt 
  • 1/2 tsp. black pepper

Combine. Store in air tight container. I usually triple this recipe and keep it in it's own spice container. 


Green Tomato Salsa

The first frost came a little early this year. I had just cuddled up on the couch with our book club book, The Spirit Catches you and you Fall Down by Anne Fadiman (an excellent non-fiction book), when an alert went off on my cell phone. It was my Weather Bug app. telling me that tomorrow night was going to be below freezing. The next day I g-chatted my husband that we needed to get all the veggies out of the garden. He babies the 'maters' like they are his children- (eats 2-3 garden tomatoes a day) and didn't want to lose the whole crop to the frost.

I came home that afternoon to him in the back yard, chilly, pink-dimpled cheeks and a sock hat (one of my favorite Adam looks ever), rummaging through the garden. By the time he was finished harvesting, we had 4-5 grocery bags full of tomatoes at various stages of ripeness. (Tons of kale, zucchini, cucumber and peppers too.)


My lovely friend Emily invited us over for her friend Autumn's birthday. Autumn happens to write a fantastic food blog as well, called Autumn Stirs the Pot. I asked her how to make green tomato salsa, and she said to roast the tomatoes and then use them like you would in any other salsa. Seemed easy enough. So I decided to give it a try. 

Here is what I did, although, the garlic and jalapeno can be adjusted according to personal taste. 

Homegrown Green Tomato Salsa (yield 2 quart-sized mason jars filled to the brim)

  • 3 lbs. green tomatoes
  • 1 green bell pepper 
  • 3 jalapeno peppers
  • 5 cloves of garlic
  • Olive Oil
  • Salt 
  • Pepper
  • 1 medium red onion
  • 1/2 tsp. cumin (to taste)
  • 1/2 tsp. salt (to taste
  • ** 1/4 c. to 1 cup cilantro (to taste. I left this out because Adam doesn't like cilantro. I know, right?!)

1. Preheat oven to 400.

2. Quarter the tomatoes. Halve and seed the jalapenos. Quarter the bell pepper. 


(<-- nail polish: OPI Russian Navy...)

3. Place the tomatoes, garlic, jalapenos and bell pepper on a baking sheet (or two) and drizzle with a good olive oil. Season with salt and pepper and pop in the oven. Bake 25-30 minutes, until the skins of the tomatoes have turned a little brown and they are sizzling and soupy.

4. Remove the tomatoes and let cool. 

5. In a food processor or VitaMix, add the onion (first), then the cilantro, then the roasted tomatoes, garlic and peppers. 
Work in batches if necessary. 

I pureed mine in a VitaMix for a more 'enchilada sauce' consistency, since I am making enchiladas for dinner :). 

If you want more of a 'salsa fresca' kind of texture, I would pulse it in a food processor until desired consistency is achieved. 

If you have to work in batches, make sure to add both batches to a big bowl and stir, so that all the ingredients get dispersed evenly.

6. Serve with chips (*can be stored in the fridge for months. It will thicken as it cools. If you want to change the consistency, just add water.)


Enjoy! xo, Amy

Wednesday, October 3, 2012

Bright Color Eyeliner


Instead of going bold on your lips this summer, try a bright shade of eyeliner instead. A big trend that was spotted on the runways this season was graphic liner... Read More >>
So far, ALL of my posts have been on food.

Here is my first on fashion- a super fun, funky fashion that I am seeing everywhere, and really enjoy. 


I am not sure of the industry technical term, but I like to call it poc (pop of color) eyeliner. Bright colored eyeliner? Neon eyeliner?  
Either way, it serves as an awesome way to tie an accessory into an outfit, or highlight a color in your outfit. 


Bright Yellow Eyeliner #POCExample.

Say you have some rad teal pants- or yellow, or magenta, blue? red? you get the point. 
 {blog post on colored pants coming soon} 
If you could find some eyeliner or eye shadow that matched, and just did a little line on the top of your lid, it would TOTALLY tie your pants into your outfit, making them look on purpose, and thus, making them easier/more comfortable to rock. 

Bold and bold with nude/earthy tones= on purpose and awesome. 
The key is not to over do it. 
Bold and bold with lots of other stuff going on= slippery slope into costume, not outfit.


I've seen lots of people with the color underneath their eyes, instead of on top. This look is nice too, but too much for daytime, in my opinion. The top of the eye is a little more hidden and adds a quiet edge to your look. The 'quiet' edgy thing is the key to being able to be as rad as you want to be, and still be taken seriously. 

Make it happen.

Find fun colored eye shadow or liner matching colors you already have in your closet. 

NEON EYELINER BEAUTY BRIGHT BLUE BACKSTAGE FASHION BEAUTY  NUDE LIPS INSPIRATION FASHION BLOG 4If using eye shadow: get the top of your lid wet. Lightly brush the shadow on starting at the outside corner- tapering as you get to the front corner. Every shadow will behave differently. If you are having a hard time getting it to stick, mix in a little Vaseline into the eye shadow.

Using shadows that are highly concentrated pigments, like those found in MAC makeup, will work best. Urban Decay is another one of my faves. These brands can be pricey- but, they last forever.

Cream eye shadow works well too, but can sometimes smear or crease, depending on the brand. 


For liner, do the same thing- start at the outside corner, thicker to thin, tapering as you come to your inside corner. The thin line on the inside is key. If it is too thick, better to restart than go with it. 

Today I am wearing MAC Eye Kohl, one of my favorite all time eyeliners, in Prunella. Something like this is a great way to start if the bold color is too much for you. It is a shimmery plum-black. The little hint of purple is enough to make it fun, without being overkill. Baby steps to edgy if you aren't quite sold. Once you rock the 'safe' color, you can slowly move to the brighter. Trust me. It is awesome. 

 Love any bright colored eyeliner for summer, but REALLY love this green!NEON EYELINER BEAUTY BRIGHT PINK ORANGE BACKSTAGE FASHION BEAUTY TONI GARRN DEREK LAM BLONDE NUDE LIPS

(A friend of mine suspected that this little trend was made popular by Cinna in the Hunger Games movie...perhaps you remember Lenny Kravitz's sweet a gold eyeliner- a look I love!)
Lenny Kravitz rockin the gold guyliner as Cinna in Hunger Games


Remember: be as rad as you want to be.

xo.

amy