Sunday, September 16, 2012

Homemade (sugar free) Apple Sauce

I get sick and tired of foods claiming to be 'all natural' when they are not. Here is a nice recipe that you can use to make your own homemade apple sauce. It is sugar free, REALLY, and all natural.

Ingredients:

  • 7-8 cups sliced apples, cores and stems removed. (I used apples from my apple tree.)


  • 1 tsp lemon juice
  • 1/2 tsp. cinnamon
  • 1/2 c. liquid from boiling the apples


 Instructions:


  1. Boil the apples, you should be left with about 6 cups of mushy apples. If you stick an apple slice with a fork,  it should slip off your fork. This is how you know they are ready. Reserve 1/2 cup of the water from boiling the apples for use later. 


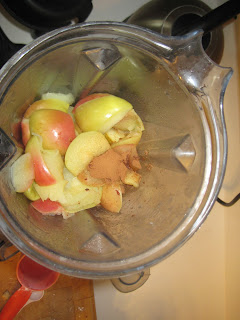
  1. Place apples, lemon juice, cinnamon and water from boiling the apples into a VitaMix or food processor. 
  2. Process until smooth.
  3. Eat on its own, or, use as a subsititue for oil in your favorite baking recipes. 
  4. Store in the refrigerator in a mason jar or other air-tight container until use. Up to one month. 


Gluten Free Chocolate Cake with Coconut

This gluten free chocolate cake is to die for. Actually, it is gluten free and vegan. With VEGAN icing! If you are not vegan, you can certainly make any icing that you wish. I will include recipes for both. :) This is not my original recipe. It comes to me from the Good Food Store of Missoula, Montana. They give out all of their in house recipes for free. This is, with absolute certainty, one of the cakes, and probably the best gluten free chocolate cake recipes I have ever tried. 

I made this cake last Tuesday for book club. We read the Night Circus by Erin Morgenstein, which was a super fun read. The cake was half-way gone before I could even take photos! So sorry about the lack if imagery. But really. This cake is so moist, no one believed me it was vegan and gluten free! 

You must try it. Don't let the crappy photos fool you. This cake is the bomb. And it is SUPER easy. No cake experience necessary.

Gluten Free Chocolate Cake with Coconut (makes 2- 9x13 cakes, or 3- 9.5 round cake/pie pans. You could certainly half the recipe. But I wouldn't recommend it. It will be gone too soon. Way too soon. I wish I had some right now...)

Ingredients:
  •  4 1/2      cups  GF mix- I used a GF pancake and baking mix, found in bulk at the Good Food Store. I am sure that you could use any GF baking mix though. Bob's Red Mill has a good one and so does Gluten-Free Mamma
  •   3 teaspoons  xanthum gum (Bob's Red Mill has xanthum gum in packages. Most recipes call for just a few teaspoons of it, so a package will go a long way.)
  •   4 teaspoons  baking powder
  •   2 teaspoons  baking soda
  •   2 teaspoons  egg replacer (or one large egg if not making it vegan)
  •    1 teaspoon  salt
  •   1 1/2 cups  cocoa powder
  •   5 cups  coconut milk- not coconut beverage- coconut milk. Find it canned in the ethnic foods section. Traditionally used in curry.
  •   1 cup  canola oil
  •   3 teaspoons  apple cider vinegar
  •   4 teaspoons  GF vanilla
  •   3 cups  sugar

For Vegan Icing:

  •  1 1/2           cups  soy milk
  •   3               cups  chocolate chips 
  •   2               cups  coconut (unsweetened if you can find it) 
*when I made this, the 'icing' was a little runnier than I would have liked. More like a glaze. I added powdered sugar by the 1/2 cup until it was a consistency I liked better. Just depends on personal preference.

For non-vegan Chocolate Buttercream Frosting

  • 3 cups powdered sugar
  • 1 cup cocoa powder
  • 8 tbsp. unsalted butter
  • 1/4 cup skim milk

Instructions for making the cake:

  1. Prepare your cake pans by spraying them with cooking spray, or, buttering and flouring (I use rice flour) them.
  2. Sift together dry ingredients except for the sugar. (I didn't use a flour sifter... because i don't have one. I just used my hands and made sure it was all combined well.)
  3. In the bowl of a stand mixer (or a bowl safe for a hand mixer), mix together wet ingredients.
  4. Add the sugar into the wet and mix with a spatula or quickly with a hand mixer- 20 seconds or so.
  5. Add the dry ingredients to the wet, mix until combined.
  6. Pour the batter evenly into what ever pans you are using- either two 9x13 square pans or three 9.5 round pans. 
  7. Bake at 350 for 40 minutes, or until a toothpick inserted into the center comes out clean.
  8. Remove from oven and let cool completely in the pans. 
To make the vegan frosting:

  1.  heat soy milk over the stove top, taking care not to burn it. 
  2. Stir in chocolate pieces and mix until the chocolate is melted and the icing is smooth. (if you need to thicken the icing, transfer it to the bowl of a stand mixer and add powdered sugar until you reach your desired consistency.) 
  3. Pour the icing over the completely cooled cakes
  4. Sprinkle the cakes with the shredded coconut

For the Chocolate Butter Cream Frosting: (if you did the round cakes, you can use this frosting as a 'glue' to make a two tiered cake... or three if you'd really like to defy gravity :)
  1. In a food processor, combine the powdered sugar, cocoa, butter, and skim milk and pulse until a smooth frosting forms.
  2. Spread the frosting generously over the top of one cake layer. 
  3. Place the other cake layer on top.
  4. Spread the top and sides with frosting.
  5. Sprinkle the top and sides with shreaded coconut
  6. refrigerate 20- 30 minutes to set the frosting
  7. Slice and serve.
Both cakes can be made in advance and refrigerated. Stick toothpicks in the top and drape with plastic wrap to keep the frosting from drying out. 


Monday, September 3, 2012

Onion Gratin

Delicious Onion Gratin

A long time ago, my grandmother, (standing in her kitchen wearing her long nightgown, holding a glass of white wine) said that a dish she had made was "au gratin." Me, being about 6 years old or so, heard "all rotten". It was right then that I made a very misinformed judgement that all things 'au gratin' were 'all rotten' and thus, very disgusting. 

It took years for me to remember this moment and finally figure out where my repulsion toward anything that was called 'au gratin' came from. Now, I just think of it as being extremely delicious. 

A Costco sized bag of onions that were going to be 'all rotten' if I didn't use them soon- led me to this fantastic recipe. http://www.saveur.com/article/Recipes/Creamed-Onion-Gratin 
I only had to make a few changes to make it Gluten Free and it is SERIOUSLY, seriously good. I would not go another week without trying it. I almost guarantee you will fall in love.


Creamy Onion Gratin 
(with some zucchini, 'cuz I had some left over from making zucchini chips)

Ingredients:

  • 2 medium yellow onions, cored and quartered lengthwise 
  • two handfuls of zucchini rounds, cut in half (optional)
  • ¼ cup olive oil 
  • Kosher salt and freshly ground black pepper, to taste  
  • 2 tbsp. unsalted butter  
  • 1 tbsp. white rice flour
  • 1 tbsp. corn starch
  • 1 cup heavy cream  
  • ¼ cup dry white wine, plus more for drinking 
  • ½ cup finely grated Parmesan  
  • 3 oz. Gorgonzola, crumbled  
  • ¼ tsp. paprika (I used smoked paprika)
1. Preheat oven to 350.

2. Place the onion (and Zucchini, if using) in a 9x9 baking dish (9x11 would work too).

3. Pour the olive oil over the top and toss the veggies.

4. Sprinkle with salt and pepper and place in the oven for one hour, until the onions are lightly browned, stirring every 15-20 minutes.

5. When the onions have about 8 minutes left, begin melting the butter in a small sauce pan over medium heat

6. These next few steps need to happen pretty quickly, so get your ingredients ready to go. Measure out the heavy cream. Add the wine to it, reserve. Measure out the flour and corn starch, mix them together and reserve. 
7. As soon as the butter is melted, add the flour/corn starch and whisk constantly, until it is smooth, about 20 seconds. As soon as it is smooth, add the cream/wine mixture, whisking constantly. Remember: over medium heat only. You do not want the mixture to begin to bubble very much at all. This will burn your flours and make them taste bad. Also, the milk will scorch and stick to the bottom of your sauce pan, which is a pain to remove and then you have to start over :'(

8. The sauce will begin to thicken- you want it to be the consistency of melted ice cream, or a light alfredo sauce... 

9. Remove the onions from the oven and pour the milk mixture over the top. Kind-of mix it around, making sure that it is all covered evenly. 
10. Turn your oven to broil

11. Sprinkle the Parmesan cheese over the top. Crumble the Gorgonzola over the top of the Parm, dust with the paprika. 
12. Broil under a watchful eye, careful not to burn the cheese, until the cheese is browned and bubbly.
13. Remove and serve. Serves 6-8

Enjoy! <3 Amy

Sunday, September 2, 2012

Cheesy Amazing Baked Zucchini Chips

Baked Zucchini Chips: 
I have been seeing all kinds of chips on food blogs lately. Apple, kale (we make these all the time), cauliflower, quinoa... the list goes on and on. I found a recipe on www.health.com for oven-baked zucchini chips that claimed to taste as though they were deep fried. I love all things deep fried,(but rarely choose that route) so I decided to adapt the recipe to make it gluten free. The recipe claims a "low-fat chip/french fry substitute" which sounded just lovely. I had an abundance of zucchini from my garden harvest which (you will see in the background of some of the photos below) so sliced up a zucchini and started the quest.
They turned out wonderful. A nice, crunchy coating on the outside, with a warm, softer middle. Kind of reminded me of fried pickles as far as consistency goes.... Ooooh! Next time, I will try this with pickles!


Baked Zucchini Chips with a Crunchy-Coat

Ingredients.


  • 10-15 corn tortilla chips, pulsed in a food processor to resemble 'bread' crumbs (of course, you can buy GF bread crumbs, but I didn't have any on hand. So decided to try some stale tortilla chips instead...) Should equal a little over 1/4 cup.

  • 1/4 cup grated Parmesan cheese, plus a bit more for sprinkling 
  • 1/4 tsp. garlic powder
  • 1/4 tsp. fresh ground black pepper
  • 1/2 tsp. salt 
  • a few pinches of smoked paprika (optional, but recommended)
  • a pinch of cayenne pepper (optional, but recommended)


  • 1/3 cup milk
  • 1 medium zucchini, cut into 1/4 inch thick wheels


Instructions.

1. Preheat oven to 425
2. Mix together all the ingredients starting at the top of the list, ending at cayenne, if you are using it. (I highly recommend using it for a nice little kick!)
3. Dip the zucchini in the milk, and dredge through the 'bread' crumb mixture. (As the crumbs begin to get wetter toward the end, you may have to press the mixture onto the zucchini, place it face down, and sprinkle the mixture on the back if you are using the chips and not GF breadcrumbs. The breadcrumbs will hold up to the moisture a little better than the chips.)

4. Place on an oil sprayed cookie sheet


5. Bake at 425 for 15 minutes. Take them out and flip them using a thin spatula. (if some of the coating comes off, just place back on top. Sprinkle them with the rest of the Parmesan cheese. As it melts, it will glue the fallen off pieces back to the zucchini.)  

6. Return to oven and bake another 15-20 minutes, or until the cheese is golden and crispy. 
7. Serve immediately. (Excellent dipped in marinara sauce, or ranch dressing. I like to add swirl of Sriracha, aka 'Rooster Sauce' to my ranch. Mostly because Adam loves it on EVERYTHING and it keeps your taste buds interested.)


Enjoy! <3 Amy